Getting Started
metaBMP is a cloud‑based stormwater management and compliance application. It allows municipalities, property managers and maintenance providers to track Best Management Practice (BMP) assets such as biofiltration basins, swales and infiltration ponds. The marketing site describes metaBMP as a map‑centric system that overlays satellite imagery and uploaded site plans so users can visualize all BMPs and their status on a single map. The application focuses on:
- Inspections and maintenance tracking – perform inspections, log repairs and keep maintenance records in one place.
- Multi‑user collaboration – municipalities, engineers and service companies share the same data, so everyone stays up to date.
- Site plans and erosion control – uploaded PDFs or drawings can be overlaid on the map to support erosion‑control inspections and reporting.
- Modern technology stack – metaBMP’s GitHub repository shows a React web UI, a mobile app, server‑side PDF generation and real‑time communication support.
The sections below explain how to use metaBMP after logging in.
1. Logging in
Section titled “1. Logging in”- Navigate to
https://app.metabmp.comin a web browser. - Choose Sign in to open the secure login page. Enter your organization‑provided email and password.
- After successful login you’ll land on the Dashboard. Your name appears in the upper‑right corner and the navigation bar shows links to Dashboard, Sites and Settings.
Tip: metaBMP is role‑based; users may be administrators, maintenance providers or read‑only. Roles determine what actions (e.g., create sites, edit BMPs) you can perform.
2. Dashboard
Section titled “2. Dashboard”The dashboard provides a high‑level view of all properties and their health.
2.1 Map
Section titled “2.1 Map”-
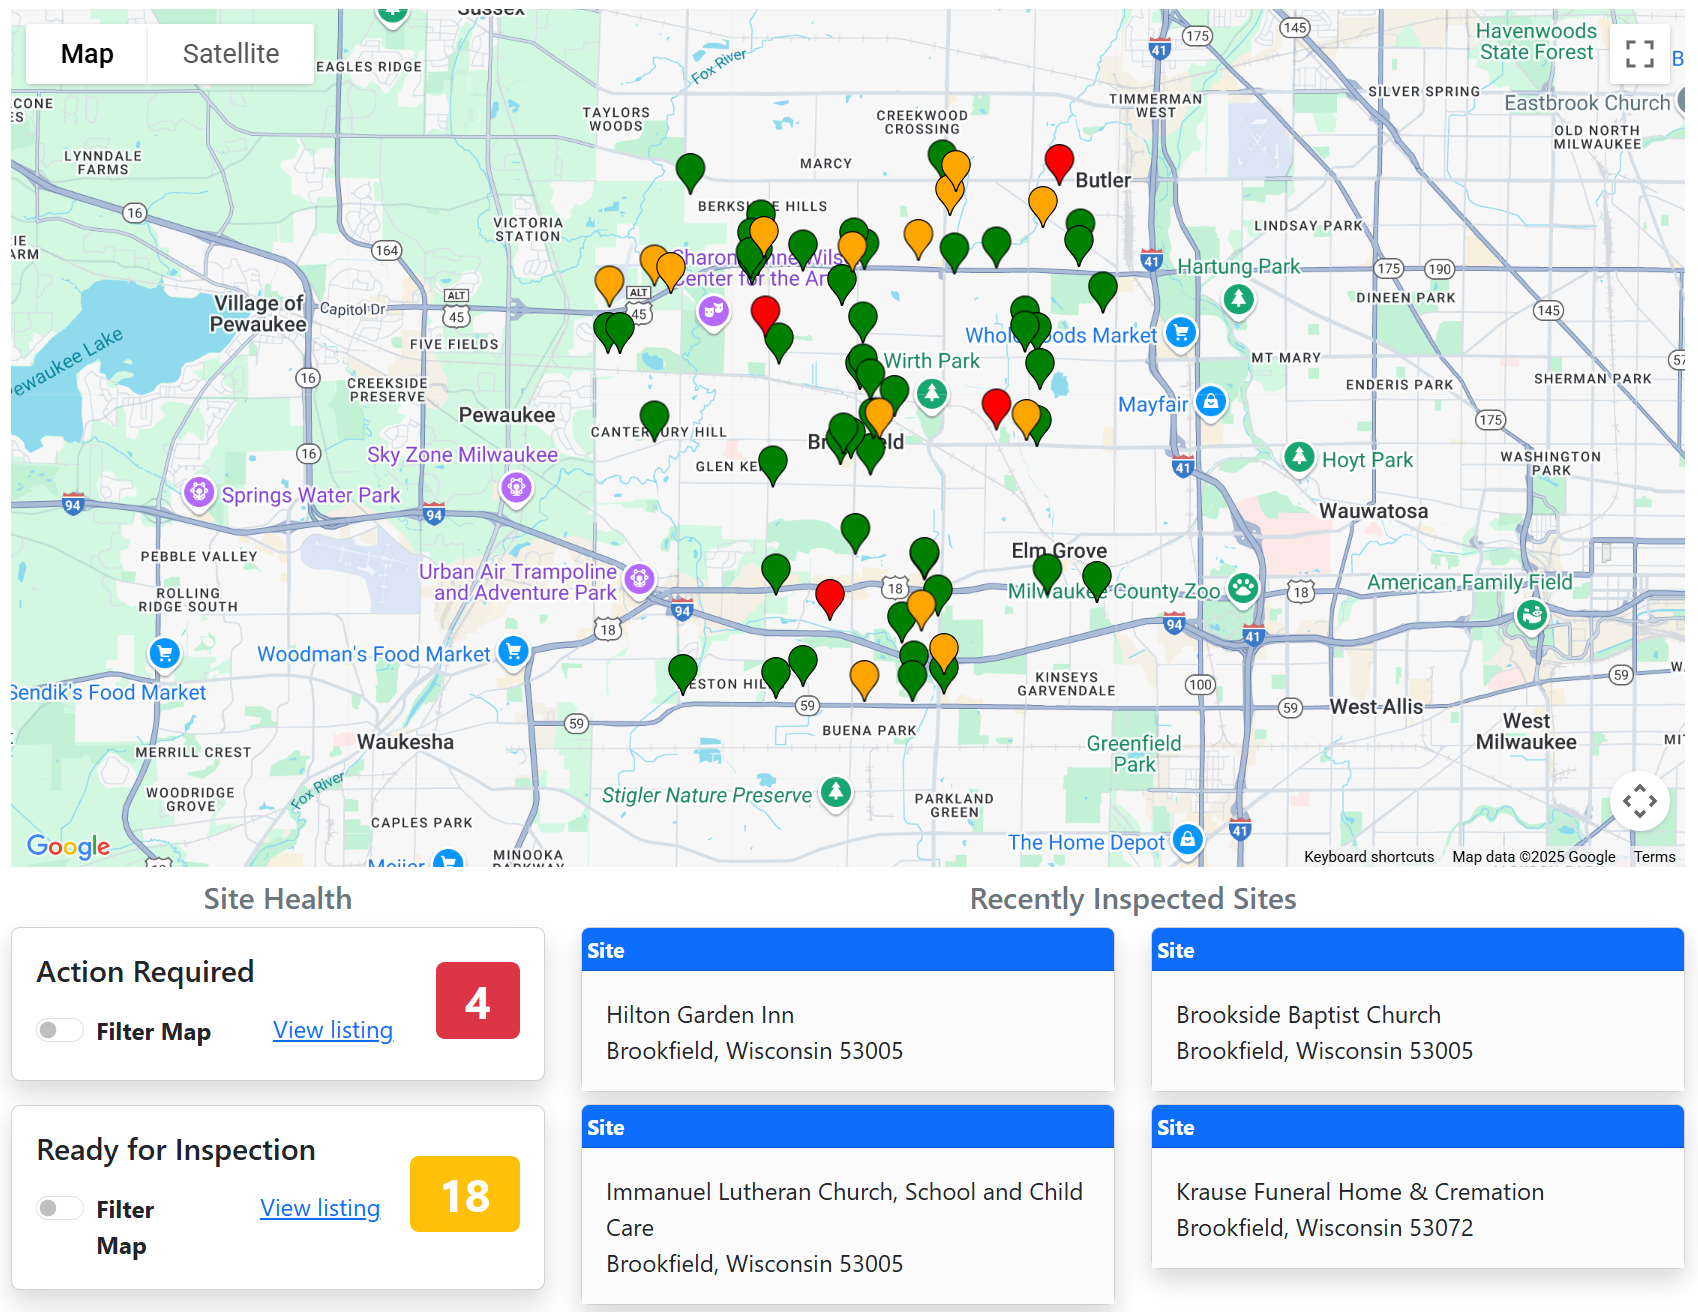
The large map uses Google satellite imagery. Each property (site) is represented by a colored pin:
- Red pins – Sites requiring action. A “Maintenance Required” label appears on the BMP cards.
- Yellow pins – Sites ready for inspection.
- Green pins – Healthy sites (all inspections and maintenance tasks are current).
- Gray pins – Sites missing inspection due‑date ranges.
-
Click a pin to see a pop‑up with the site name and address. The pop‑up includes a Property Detail button which opens the site page.
2.2 Site Health panels
Section titled “2.2 Site Health panels”Below the map are four cards summarising site status:
| Card | Description |
|---|---|
| Action Required | Shows the number of sites that require maintenance or have overdue inspections. Toggle the Filter Map switch to hide/show these sites. Click View listing to open a list of affected sites. |
| Ready for Inspection | Sites where inspection intervals are due soon (within the configured date range). |
| Healthy Properties | Sites with no outstanding maintenance or inspections. |
| Missing Due Date Ranges | Sites where inspection schedules haven’t been set; configure due‑date ranges in the BMP configuration. |
2.3 Recently inspected sites
Section titled “2.3 Recently inspected sites”To the right of the map, metaBMP shows recently inspected properties. Click a listing to go directly to the site.
3. Searching and creating sites
Section titled “3. Searching and creating sites”3.1 Global search
Section titled “3.1 Global search” At the top of every page is a Search metaBMP… bar. Use it to quickly find properties or tasks:
- Click the search bar and type a site name, BMP type or address. A results panel appears with matching sites.
- Select a result to open the site page.
- If the property doesn’t exist, choose Create New Site from the Actions column. This opens the Create New Property form.
3.2 Creating a new site
Section titled “3.2 Creating a new site”- In the Create New Property form, begin by selecting an address from the Google Places dropdown. metaBMP uses this to fill the Address, County, Latitude and Longitude fields.
- Enter a Name for the property (e.g., “Industrial Park – Lot 3”).
- Verify the pre‑filled address details and adjust if necessary.
- Click Save. The new property will appear on the dashboard and in the Sites list. You can now add BMPs to the site.
4. Managing sites
Section titled “4. Managing sites”4.1 Sites list
Section titled “4.1 Sites list”Click Sites in the navigation bar to see all properties your organization manages. The table shows each site’s name, the number of BMPs and a Site Detail link. Select the row to expand details or use the link to open the site page.
4.2 Site page overview
Section titled “4.2 Site page overview”The site page has a two‑column layout:
-
Left column – BMP cards
- Each BMP card displays the BMP type (e.g., Biofiltration Basin, Grass Swale), a color indicator (matching its status), and summary fields for Attributes, Components, Service History and Inspection Due Dates.
- Buttons on the card:
- Map icon – Focuses the property map on this BMP and opens a mini pop‑up.
- Perform Service – Opens a form to log a maintenance or inspection event for this BMP (see section 6).
- Menu (three bars) – Contains options such as Edit (opens the BMP detail page) and Create New From Copy to copy configuration from another BMP.
-
Right column – Map and tabs
- The site map shows markers for each BMP within the property boundary. Click a marker to open a pop‑up with the BMP name, quick links to components and a magnifying‑glass icon to jump to the BMP detail page.
- Below the map is a tab strip:
- Detail – Displays site details (name, permit number, address, notes, etc.). A small Actions dropdown allows you to Edit (opens Site Settings), Adjust Pin Location, View in Google Maps, or Create Inspection Report.
- Contacts – Shows people associated with the site and their roles. Use Manage Contacts to add or edit contacts in Site Settings.
- Inspection Reports – Lists prior inspection reports. Click Create New Report to compile a new report covering multiple BMPs (see section 7).
- Documents – A drag‑and‑drop area where you can upload documents (site plans, photos, inspection forms). Documents uploaded here can later be selected as site plans in BMP configuration.
5. Adding and configuring BMPs
Section titled “5. Adding and configuring BMPs”5.1 Adding a new BMP
Section titled “5.1 Adding a new BMP”On the site page, click Add BMP above the list of BMP cards. A modal appears asking for the Type of BMP. Choose the appropriate option (e.g., Biofiltration Basin, Infiltration Basin) and save. The new BMP will appear in the list.
5.2 BMP detail and configuration
Section titled “5.2 BMP detail and configuration”Click a BMP name or choose Edit from its card menu to open the BMP Detail page. The left sidebar lets you switch between Recent Service and Configuration.
-
Recent Service – Lists recent service entries for the BMP. Initially there may be none; you will add service entries via the Perform Service button on the site page (see section 6).
-
Configuration – Here you set up the BMP’s metadata:
- Components – Click Add Component to add physical components (e.g., outlet pipe, overflow weir) that may require inspection. Each component can have its own status and notes.
- Attributes – Click Edit to enter properties such as surface area, depth or infiltration rate.
- Inspection Due Dates – Use Add Inspection Due Date to specify the date ranges when this BMP must be inspected (e.g., spring and fall). These ranges drive the dashboard’s “Ready for Inspection” and “Action Required” statuses.
- Set Pin Location – Drag the blue marker on the map to the exact location of the BMP within the property. Click Save to persist the coordinates.
- Site Plan – If your organization uses site plans, upload a PDF via the Documents tab of the site, then choose it here. The site plan will overlay on the property map, providing context for inspections【337051758297824†screenshot】.
- Danger Zone – At the bottom of the configuration page is a red Delete this BMP button. Use it to remove the BMP from the property.
6. Performing service and logging inspections
Section titled “6. Performing service and logging inspections”Recording maintenance or inspection activities keeps the system up to date.
- On the site page, click Perform Service on the BMP card.
- A Service Details modal appears:
- Performed By – Select the person who conducted the service. This list comes from contacts and organization users.
- Performed When – Choose the date.
- Service Type – Pick the type of service (e.g., Inspection, Maintenance, Repair). Service types are defined by your organization.
- Components – Click the link to select which components were serviced; optional.
- Notes – Provide inspection notes or observations.
- Click Save to log the entry. The Service History section of the BMP card updates, and due‑date calculations adjust accordingly.
7. Creating inspection reports
Section titled “7. Creating inspection reports”metaBMP can produce inspection reports that combine multiple BMP inspections into a single PDF.
- On the site page, switch to the Inspection Reports tab and click Create New Report.
- The Create Inspection Report pane appears. Fill out general information:
- Date – Defaults to today; adjust if necessary.
- Performed By – Select the inspector.
- Current Temperature, Date of Last Precipitation, Current Conditions, and Precipitation Today – Optional fields to capture environmental conditions during the inspection.
- On the left, each BMP appears as a panel. Click a BMP to choose which of its inspections (service entries) to include. The selected inspections appear in the Included Inspection list.
- When finished, click Save. metaBMP will generate a PDF report and list it under the Inspection Reports tab. You can download or view the report later.
8. Site settings
Section titled “8. Site settings”From the site Detail tab click the Actions dropdown and choose Edit to access Site Settings. The left sidebar contains sections for Detail, Options and Contacts.
- Detail – Edit the site’s name, permit number and property notes. Confirm address fields (street number, street, city, state, zip and county) and toggle whether a Storm‑Water Maintenance Report is required.
- Options – A simple toggle labelled Enable Site Plan. Enabling this allows you to overlay site plan PDFs on the site map (configured in the BMP settings).
- Contacts – Maintain contacts specific to the property. Click Add Contact to enter a first name, name, title/label and email. These contacts appear in the Contacts tab of the site and can be selected in service entries.
9. Account settings and subscription management
Section titled “9. Account settings and subscription management”Click Settings in the top navigation to manage your personal preferences and organization subscription.
9.1 My Profile
Section titled “9.1 My Profile”- Inspection Performed – Daily Email – Subscribe to a daily summary email listing inspections performed across your sites.
- Theme – Switch between Light and Dark modes to suit your preference.
- Engineer’s Seal – Upload a seal image to automatically stamp inspection reports with your professional seal.
9.2 My Subscription (Organization administration)
Section titled “9.2 My Subscription (Organization administration)”Users with appropriate roles (e.g., municipality administrators) can manage their organization:
- Subscription and Usage – Displays the organization name, subscription status and usage metrics such as total sites and BMP count.
- Users – Lists all users in the organization. You can edit existing users or click Create New User to invite someone by email and assign a role.
- Organizations – Shows collaborating organizations. metaBMP supports cross‑organization collaboration; cooperating agencies can be given access to specific sites.